PHY 1405 – Conceptual Physics I
Making a Spring Scale
Leader: ____________________________ Recorder: __________________________
Skeptic: ___________________________ Encourager: ________________________
Materials
Helical Spring Balloon
Mass hanger 1 latex glove
Laptop Masking Tape
Gram mass set
Introduction
A fundamental property of
matter is that if you stretch it a little bit and then release it, it returns
to its original shape. We refer to this
type of behavior by saying matter is elastic. Of course some matter is more elastic than
other but none is infinitely elastic. If
you push or pull on matter hard enough, you can exceed its ability to return to
its original shape. In that case we say
that we exceeded the elastic limit,
and you can change the shape of an object or break it.
In this activity we want to
explore the elastic behavior of matter.
A familiar object which shows elastic behavior over a large distance is
a spring. It turns out that there is a
very simple relationship between how hard you pull on a spring and the amount
it stretches, known as Hooke’s Law.
In this activity, we will investigate that relationship between the
force used to stretch a spring and the amount that the spring stretches. This relationship is the idea behind how
spring scales work, and we will make our own spring scale at the end of this
lab.
Procedure
You group has been given an uninflated balloon. Hold one end of it and pull on the other.
Q1) Does the balloon stretch?
Release the balloon.
Q2) Did the balloon return to its original shape?
Q3) Would you say the balloon is elastic? Explain.
This time stretch the balloon further.
Q4) To stretch the balloon further, do you have to pull the same, less or more than before?
Your group should have a latex glove. Note some people have an allergy to latex. Do not handle the glove if you are allergic to latex. Stretch the latex glove and then release it.
Q5) Was the latex glove easier or more difficult to stretch for a given distance?
Q6) What properties of a material do you think will affect how elastic it is?
Try stretching the glove further.
Q7) To stretch the glove further, do you have to pull the same, less or more than before?
Q8) Complete the following. To stretch an elastic material a greater distance a ____________ force must be applied.
This suggests that there is a specific type of relationship exhibited between the force required to stretch an elastic material and the distance it stretches.
Q9) The force applied to an elastic material is ___________________ to the distance the material stretches.
We will now investigate elasticity quantitatively and test our hypothesis formed in Q9 for the case of a spring.
1. Set-up
Use clamps to suspend the provided spring in front of the meter stick mounted to a ring stand. Hang the mass hanger from the bottom of the spring. You want to arrange your experiment such that the position of the bottom of the mass hanger with respect to the meter stick can be easily determined. Your set up should appear as in figure 1.
Figure 1 Experimental set up for the determination of Hooke's law.
2. Data Acquisition
We will now apply a force to stretch the spring by hanging a known weight from the spring. Note the position of the bottom of the mass hanger, then place a .50 N weight on the mass hanger. Record the change in length of the spring in the table in figure 2. Repeat your measurements by adjusting the weights to increase the force on the spring to 1.0 N and then 1.5 N, 2.0 N, and 2.5 N, respectively. For each weight, record the stretch of the spring from the position with only the mass hanger in the table in figure 2.
Figure 2 Data table for Hooke's Law
|
Spring Stretch (cm) |
Weight (N) |
|
|
0.5 |
|
|
1.0 |
|
|
1.5 |
|
|
2.0 |
|
|
2.5 |
Data
Analysis
Graph
the Data
An important first step in analyzing data is to graph it. In this case graph your data as Force vs. stretch on an x-y coordinate system. To accomplish this we will use a piece of software called LoggerPro - which we will often use in this course.
Please note that graphs are always described by saying the y coordinate vs. the x coordinate. So when you graph Force vs. Stretch, Force will be on the y-axis and Stretch will be on the x-axis. Also, when you construct a graph it should always have the following features.
1. A descriptive title
2. Each axis labeled with the quantity it represents. The units of measure should be included in parentheses following the label.
3. Each axis should have tick marks with values labeled
4. The data should fill the graph appropriately
Double click on the icon for LoggerPro 3.1 (looks like the jaws of a caliper). Close the Hint Box the comes up, then click OK on the dialog box that asks if you want to Continue Without Interface. Enter your data in the table. Put the stretch data in the column labeled x and the force data in the column labeled y.
We want better titles than just X and Y. Double click on the X label on the data table. A window will come up where you can enter an appropriate title as well as units for the x-axis. Repeat for the y-axis.
At this point, you should have a good graph except it doesn’t fill the page very well. Move the cursor just slightly to the left of the y-axis on the graph. An s-shaped line should appear. Double click and a dialog box should appear. If not already chosen, click on the tab labeled Axes Options. Underneath the Y-Axis choose Autoscale from the Scaling Menu and choose the same under the X-Axis. At this point you should have a good graph of your data.
Model
the Data
Q10) When you doubled the force, by what factor did the stretch change?
Q11) When you tripled the force, by what factor did the stretch change?
Q12) When you quadrupled the force, by what factor did the stretch change?
Q13) What type of relationship shows this behavior?
Probably in Q13 you answered either direct, proportional, or possibly directly proportional. In such a case we expect a mathematical relationship between force and stretch of the form F = kx where k is a proportionality constant. We can use the software to find k.
Click on the button with a curve with f(x) = below the curve. A window will appear from which you can fit different types of mathematical relationships to your data. Choose proportional and click on the button which says Try Fit. Click OK to accept the fit. The graph will now have a box which shows the proportionality constant that the computer found labeled as A.
Q14) Print a copy of your graph to attach to your report at this point.
Q15) Record the proportionality constant found by the computer including units.
Q16) Use the proportionality constant to complete the following relationship.
F = ______ x
The proportionality constant is known as the spring constant. It is usually interpreted as a measure of how stiff a spring is. The greater the spring constant, the stiffer the spring.
Q17) Give an interpretation of the meaning of the proportionality constant that you determined by completing the following statement. It takes a force of __________ to stretch the spring by _______.
Q18)
Q19) Use your answer to Q16) to find the stretch that would result if a force of 1 N were applied.
Make
a Spring Scale
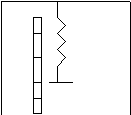
Tape a strip of masking about 50 cm long to the table. Make a mark at the top of the tape labeled 0 N. Use a meter stick to mark 1 N increments on the tape from the 0 N mark using the distance you found in Q19). Subdivide each of your 1 N increments into 5 equal pieces so that your scale will read to the nearest .2 N. When completed your tape should appear something like that shown in figure 3.
Figure 3 Sample Scale

Remove any weights from the mass hanger. Attach your scale vertically to the meter stick on the ring stand so that the 0 N mark coincides with the bottom of the mass hanger. Congratulations, you have just made a spring scale.
Trade the
Use the spring scale you have just made to find the weight of the following masses.
|
Mass (kg) |
Weight (N) |
|
.080 |
|
|
.120 |
|
|
.140 |
|
|
.160 |
|
|
.180 |
|
Q20) Do you observe any relationship between the mass and the weight? Describe it.
We will explore the relationship between mass and weight more in Ch. 4