Lesson 5 – Publishing
Perhaps the most important aspect of using Flash is ensuring the files you author can be seen by your audience, and download quickly enough to avoid frustration.
Testing the Movie
The first step in completing your project is, of course, to test the movie to ensure functionality (CONTROL > Test Movie > Test). This displays how the completed file will look and act online (note that in test mode, you can see elements of your animation that are offstage. These won't show online; everything will be clipped to the dimensions of the stage). Also not evident while testing is how the movie will stream.
"Streaming" refers to how Flash
starts displaying the animation as soon as the first few frames download,
rather than waiting for the whole file to download, like older video
playback software did. The problem inherent with any streaming media
is that the actual rate at which files download over the web varies
moment by moment, and the playback could stutter if not enough frames
are buffered (downloaded ahead of where the actual playback is in progress).
In Flash CS6 the Bandwidth Profiler (shown below) lets you see how the file is likely
to stream (this too was inexplicably removed in CC).
*In actuality, a special server is required to stream Flash or any other media, accounting for the moment-by-moment fluctuation in data transfer rate, so the more technically accurate term is "progressively download."
The Bandwidth Profiler
The Bandwidth Profiler (in Flash CS6 test the movie, and then choose VIEW > Bandwidth Profiler) graphs the "bulk" of each frame in the animation, showing you where delays are likely for a given modem speed (choose the modem speed in VIEW > Download Settings...). Each bar represents the contents of a single frame of the animation (if you choose VIEW > Show Frame-by-frame). Wherever a bar rises above the red horizontal line, there will likely be a downloading delay (the first frame is almost always problematic, as that's where a lot of artwork is first introduced). You can click any bar of the frame-by-frame bar graph to see its total kilobyte bulk (in the illustration above, the contents of frame 15 total 215 bytes).
Techniques for keeping the bandwidth of frames low include:
-
Turn any artwork that appears more than once into a symbol.
-
Use tweened animations instead of frame-by frame animation.
-
Limit the use of special line styles (dashed, dotted, ragged).
-
Limit the use of photos, sounds, video and gradients.
-
Limit the use of Alpha color effects on symbols.
-
Use Modify > Optimize to minimize the number of curves that are used to describe shapes.
-
Limit the number of fonts and font styles.
-
When incorporating text fields, use the device fonts (_sans, _serif, and _typewriter) which switch to the nearest equivalent font on the users computer, instead of embedding specific fonts.
-
Use MP3 sound compression for long sounds.
-
Trim the silent part out of sounds using a sound editor, or the In- and Out-points in the Edit Envelope dialog of the Properties panel.
- limit the use of filters and blending effects.
Preloaders
To combat that initial delay in the first frame, you might try creating a preloader. This is usually a simple image or animation that loads quickly, and entertains (distracts) the viewer while giving the first few frames time to buffer. Examples of a preloaders include a progress bar, or a short phrase such as "Are you ready for the coolest animation you've ever seen?" (avoid phrases like "Please wait", "Loading", or "May as well go get coffee; this is going to take awhile." These only remind the viewer that they are already experiencing a delay!)
The concept of a preloader is to introduce the large graphics used in other scenes, so they can appear onstage instantly when needed (exactly like preloading JavaScript rollover images on a web page). One approach is to sequentially load these large graphics out of sight while a simpler animation distracts the viewer.
Another approach to a preloader is to use ActionScripting to detect when the whole movie has loaded before trying to play it. This will be covered in the Flash 2 class.
To create a preloader for your missile attack movie:
-
Open the Missile attack movie you built in the previous lesson, and ensure the city artwork you drew is defined as a symbol, and the missile is also a symbol.
- Open the Scene panel (WINDOW > Other Panels > Scene).
- Press the "+" button at the bottom of the Scene panel to
add a new scene:
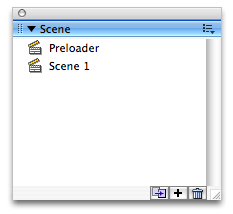
- Rename the new scene "Preloader" by double-clicking it,
and move it to the top of the list (scenes play in the order they appear
on the Scene panel).
- In the Preloader scene, create a 60 frame animation, using only 1
or 2 very simple shapes (in the example above, a crosshair and a circular
shape which masks the city are the only new pieces of artwork introduced).
- Add a new layer called "Preloaded art", and insert blank
keyframes at frames 10, 20, 40 and 60.
- The largest elements in the file are the launch button, the missile,
the city, and the two sound files. Place the Missile symbol in frame
10 of the Preloaded Art layer, beyond the edge of the stage (so it won't
be visible in the finished .swf file.
- Place the city in frame 20 of the Preloaded Art layer, off to the
side of the stage.
- Place the Button in frame 40 of the Preloaded Art layer, off to the
side of the stage.
- Select frame 60 of the Preloaded Art layer, and on the Properties panel,
set the sound to Explosion, and the Sync to "Stop" (this causes
an instance of the Explosion to start downloading, but not to audibly
play).
- Since the Jet sound spans relatively empty frames in Scene 1, and it is not critical to start exactly when the button is pressed (due to it's quiet beginning) it probably does not need to be preloaded if it is set to stream. In Scene 1, select the Keyframe in which the Jet sound starts, and on the Sound panel, set its Sync to "Stream."
- Save the movie, and Test it, viewing the Bandwidth Profiler.
A note about using Scenes: When the SWF is compiled, the scene divisions are removed, and merged into a single timeline. There is not really a difference between using Scenes and using different sections of the Timeline in a single scene. However, most Flash developers discourage the use of scenes. Instead, different Movie Clips and even different Flash files are used to store the various states of an application, making transitioning between these states a little easier (loading SWFs can be controlled and monitored with ActionScript, and Movie Clips can be moved in and out of view with ActionScript). Scenes are just a quick and easy way to divide your Timeline into sections in the authoring environment. To navigate from one scene to another, the gotoAndPlay() action would pass two parameters: gotoAndPlay("scene", frameNumber);