
Creating a Group with Google Apps for Education
OPTION #1 (If you choose Option #2, click HERE)
Once logged on to Google Apps for Education, you will choose “Groups” from the drop-down arrow in the upper-left hand corner of the window.


To create a NEW group, you will click on the button Create… This button is located in the upper-right hand corner of the window.

A new window will open and you will find many new options and entry fields for your group. You may choose a name for your group (make sure your group name represents your group and it’s functions), an email address for your group, obtain the web address for your group, write a group description, and choose and Access level for your group.
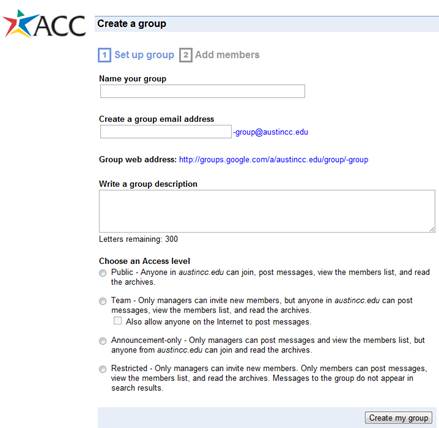
Make sure to read through the Access levels to make sure you select the right type of group for your specific needs.
Access Levels
- Public - Anyone in austincc.edu can join, post messages, view the members list, and read the archives.
- Team - Only managers can invite new members, but anyone in austincc.edu can post messages, view the members list, and read the archives.
- Also allow anyone on the Internet to post messages
- Announcement-only - Only managers can post messages and view the members list, but anyone from austincc.edu can join and read the archives.
- Restricted - Only managers can invite new members. Only members can post messages, view the members list, and read the archives. Messages to the group do not appear in search results
After you enter all your group information, click on the button Create my group. The access levels may be changed at any time after creating your group.
Click Next>> to learn about how to Add Members....