
Add Members
The next step is to Add members to your group. If you chose “Restricted” access, you will notice that you can only add members directly to your account.
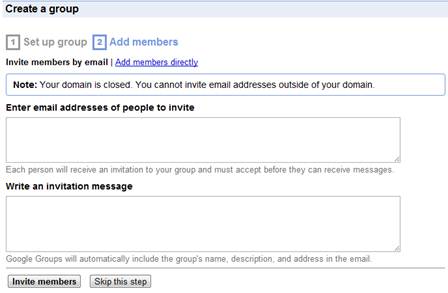
Enter the email addresses of the people you would like to invite into the text field. Place your cursor in the text box until you see the blinking cursor and start typing. The emails should populate if the prospective members are on the Austin Community College Districts email system. If the prospective members are not on the email system, you will need to manually enter their email addresses. Make sure the email addresses are separated by a comma.
Write an invitation message to be sent along with your invitation. Place your cursor in the text box until you see the blinking cursor and start typing.
After you add your prospective members and write your invitation message, you are ready to Invite Members. Click on the Invite members button on the lower left-hand side of the window.
You do have the option of skipping this step if you do not need to add members at the moment. You may choose to add members at any time.
After you click on the Invite members button, you will receive verification that your group has been created.

Click on Visit your new group to access your new Group.

Click Next>> to learn about Groups...